In this session, we looked at infographics and how we can use the information or stats that we have to make a video out of it. Below is a video of the kind of work that we were supposed to do, displaying information in a way that is clear and easy to understand.
TakePart: Participant Media - Waiting For 'Superman' - Infographic from Jr.canest on Vimeo.
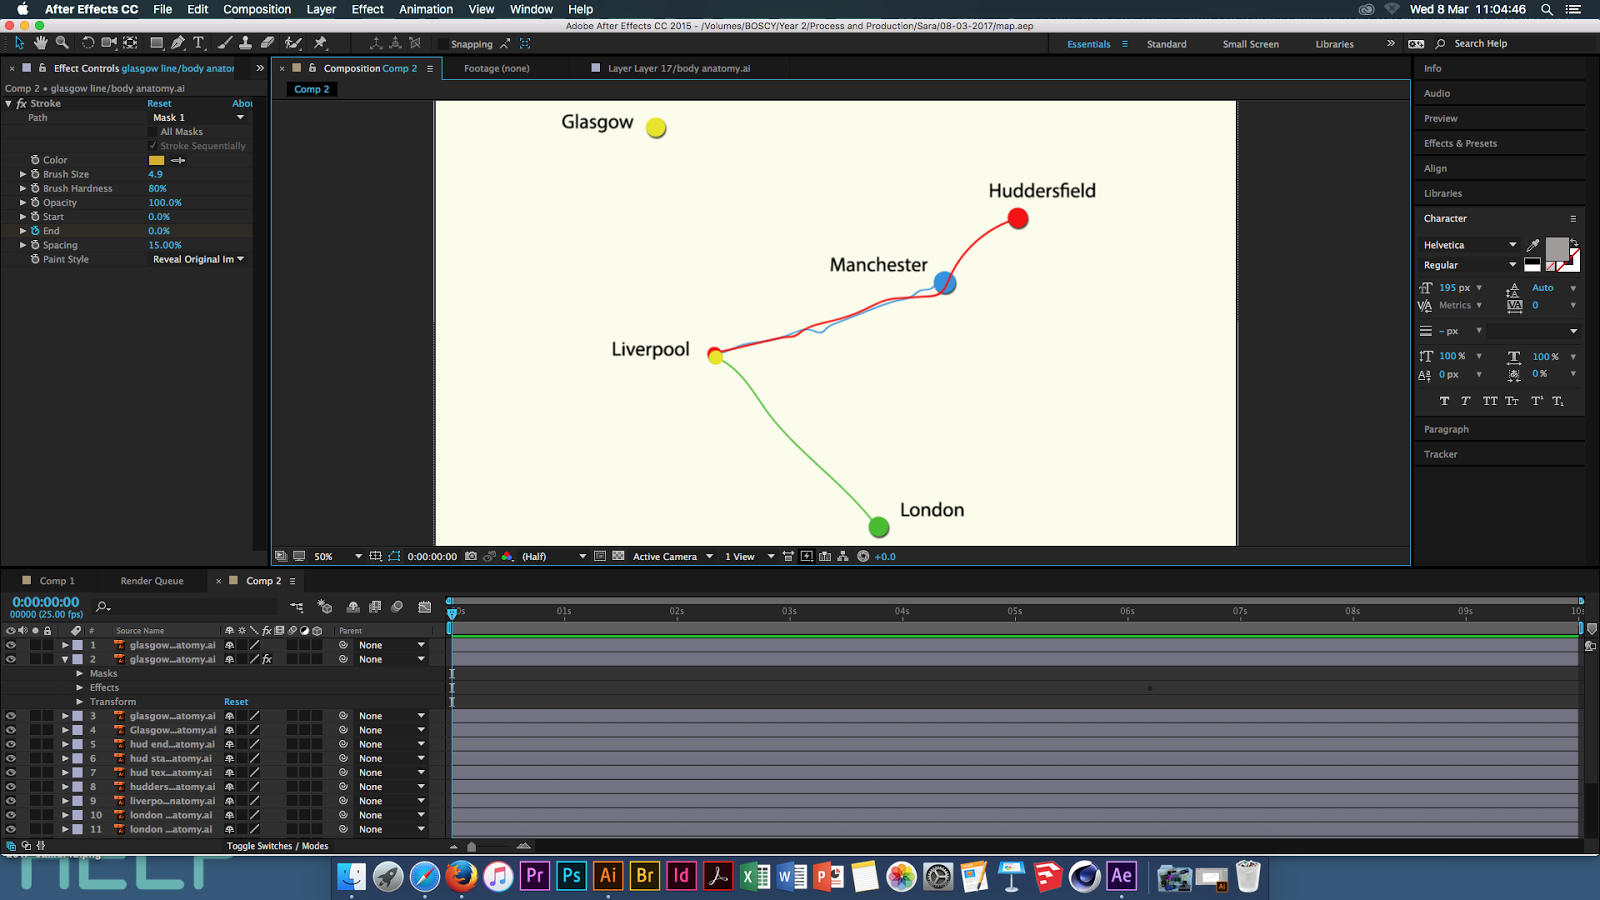
Before I could start this process, I had to have some kind of information to work with, I thought of the amount of times I have travelled with the train and how long it takes me to different places. With this piece of information, I designed a simple map of the places I went to and the distance of the journey on Illustrator. I used coloured coded lines to separate the places. I wanted to make it as simple as possible for the viewer to understand.


I uploaded it on After Effects. The next step was, I wanted to make the lines travel from one point to the other so it represents the journey taken by the train. To achieve that, I went over the lines with the pen tool and made sure the pen tool was revealed on the original image, then I went to 'effect', 'generate' then 'stroke', as shown in the images below. I experimented with the brush size, brush hardness and opacity. For it to move, I had to change the end to 0% then clicked on the stopwatch, moved the timeline to where I want it to finish and move the end back to 100%, after that, when I press play, the lines would move from one end to the other.


The next step was to make the map tilt or make it move like the Earth does when it rotates, just to make it realistic and make it interesting. To do that, I created a new composition, uploaded the map design to After Effects, clicked on the cube option, as shown in the images below, after that, I just experimented with the X,Y and Z rotation options. For me to make the map appear from the floor, I used the X rotation option.


The next step was to create the other part of the information for the video, the first part was to show where I have travelled, the second part, which is this one, is to show the viewer how long it took me. To represent that, instead of using rectangles to create the graph, I used the shape of the train because we're talking about trains so it makes sense. I simply just changed the shape of the train depending on how long the journey took me, for example, as shown below, the train for Manchester is shorter than the train for Glasgow because it took less time. Obviously, I added the name of the places next to it to tell the viewer which is which.


I created it on Illustrator. The next step was to upload it on After Effects and make it appear onto the screen. To do that, I created a new composition first of all, to make it move, I moved the anchor point to where it would start moving then used the scale option and experimented with it, as shown below, to make it appear onto the screen.


Since there are different scenes going on in this video, I had to create a part inbetween to make one scene move onto the next in a nice flowing way to keep the video going and moving along. The idea is to use the train to do that, so, the train would drive across the screen, makes one scene disappear then as it drives past, the next scene appears.
To do that, I had to go back on Illustrator, make the train bigger than the standard TV screen size, 1920 x 1080 pixels and edit the artboard to fit the train. What I had to make sure was that the train covered the whole screen so you couldn't see the previous or next scene as it drives past. I then uploaded it on After Effects.
To make the train drive past, I used the position option, as shown below, I had to make sure that before the train started, it was out of the screen and after it finished, it was also out of the screen.


The last part was to put everything together in a new and final composition.
Below is what I have created in the session....
Experimentation with time from Daniel Boscarino on Vimeo.
No comments:
Post a Comment